Discover how to make the ultimate ham and cheese sliders with Angela’s easy, melt-in-your-mouth recipe. Perfect for game days, busy weeknights, or family gatherings, these buttery Hawaiian roll sandwiches are a guaranteed crowd-pleaser that your kids and friends will absolutely rave about!

Hi there! I’ve learned that the best meals are the ones that disappear in minutes. At 50, I’ve hosted my fair share of tailgates and birthday parties. Trust me, nothing brings people together quite like a tray of warm ham and cheese sliders.
They are the perfect mix of sweet, salty, and savory. Plus, they’re so easy to whip up! Have you ever needed a dish that works for both a fancy brunch and a rowdy football Sunday? These sliders are your answer. I love how the house smells when that buttery glaze starts bubbling in the oven. It feels like a giant hug for your kitchen.
Let’s get cooking and make some memories together, shall we? You’re going to love how simple these are to put together. Whether you are a seasoned pro or just starting your cooking journey, this recipe is foolproof and so rewarding.
Table of contents
Ingredients for Your Ham and Cheese Sliders
To make the best ham and cheese sliders, you need a few pantry staples and some fresh deli finds. I always say that quality ingredients make a world of difference, but don’t feel like you need to break the bank.
- 1 pound Hawaiian Rolls: You can use 24 small ones or 12 large ones. Their signature sweetness is the secret to that classic flavor.
- 1 pound Deli Ham: Ask for it thinly sliced. It folds better and creates a great texture that isn’t too tough to bite through.
- 1 pound Swiss Cheese: This provides that classic, nutty melt we all crave in a good sandwich.
- 1/2 cup Butter: Make sure it is completely melted so it mixes smoothly with the spices.
- 2 tablespoons Brown Sugar: This adds a hint of caramel sweetness to the crust that pairs perfectly with the ham.
- 1 tablespoon Dijon Mustard: It gives a tiny bit of tang to balance the sugar and the richness of the butter.
- 1 1/2 teaspoons Worcestershire Sauce: This adds a deep, savory “umami” punch that rounds out the glaze.
- 1 tablespoon Poppy Seeds: These provide a lovely little crunch and make the rolls look beautiful.
- 1 tablespoon Dried Minced Onion: These little bits get toasted and flavorful in the oven. If you prefer a smoother texture, you can use 1 1/2 teaspoons of onion powder instead.
Tasty Substitutions and Additions
Don’t feel like you have to stick strictly to the script! Cooking should be an adventure, and your kitchen is your playground. If you are a fan of rich, melty toppings and savory bakes, you’ll find that these sliders share a lot of DNA with my chicken with mayo and parmesan cheese. Both recipes rely on a creamy, savory topping to keep everything juicy while it bakes.
If Swiss cheese isn’t your favorite, try using sharp cheddar or provolone. Both melt beautifully and offer a different flavor profile. For the ham, a honey-roasted variety adds extra sweetness, or you could try smoked turkey for a leaner twist.
Want a bit of spice? A few pickled jalapeños tucked inside will really wake up your taste buds and add a nice vinegar kick. If you find yourself with extra ham after assembly, don’t let it go to waste! It’s the perfect starter for a hearty ham and white bean soup the next day.
I sometimes add a thin layer of mayonnaise on the bottom bun before adding the meat. It adds extra moisture and richness that keeps the bread soft. Feel free to swap the poppy seeds for sesame seeds if that’s what you have in the cupboard. It’s all about making it work for you and your family.
Expert Tips for Perfect Ham and Cheese Sliders
After years of making these for my hungry crew, I’ve picked up a few tricks that make a big difference. First, don’t slice each roll individually. Keep the slab of rolls whole and slice the entire thing horizontally with a long serrated knife. This saves so much time and keeps the sandwiches uniform!
When layering your ham, try to “ribbon” or fold the slices rather than laying them flat. Folding the meat creates air pockets that catch the melted cheese and the buttery glaze. It makes the sandwich feel much lighter and more professional.
Speaking of glaze, let the assembled sandwiches sit for about 10 minutes before putting them in the oven. This gives the bread a chance to soak up that delicious butter and mustard mixture. If you’re worried about soggy bottoms, place the bottom half of the rolls in the dish first and toast them for 5 minutes before adding toppings.
Always cover the dish with foil for the first half of the baking time. This helps the cheese melt perfectly without burning the tops of those sweet rolls. Then, for the last ten minutes, take the foil off to let them get golden and crispy.
Lastly, when it’s time to serve, use a sharp knife to cut along the natural lines of the rolls. This ensures everyone gets a perfect, self-contained slider with plenty of filling.
Step-by-Step Instructions
- Preheat your oven to 350 degrees. Spray a 9 by 13 inch baking dish with cooking spray to prevent sticking.
- In a small bowl, whisk together the melted butter, brown sugar, Dijon, Worcestershire, poppy seeds, and onion until well combined.
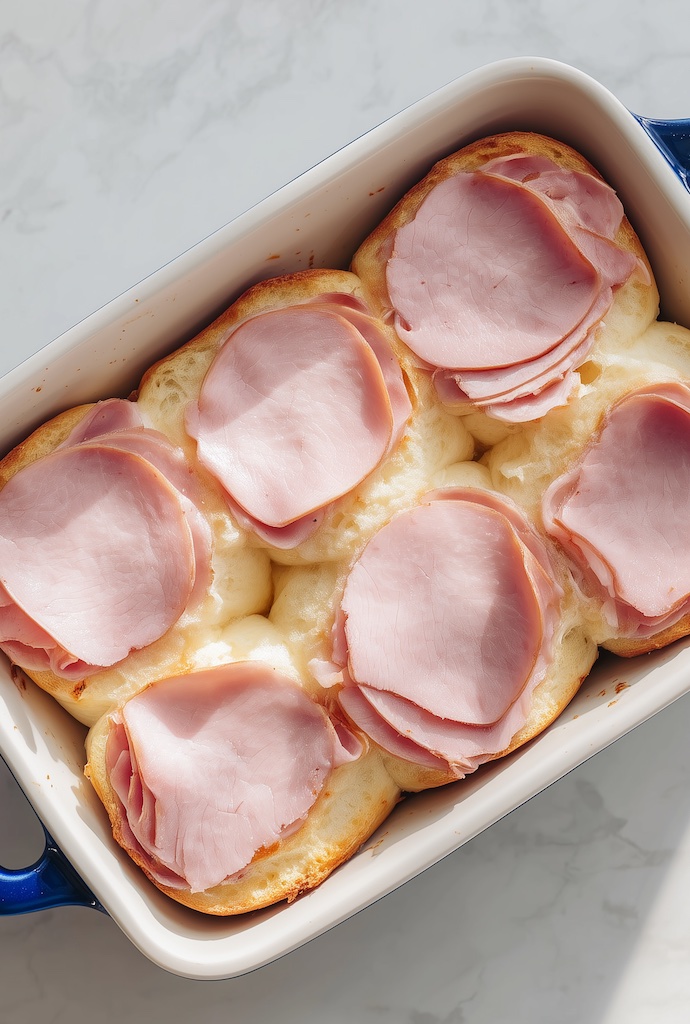
- Slice your rolls in half horizontally as one big piece. Place the bottom half into your prepared baking dish.
- Layer half of your sliced ham evenly over the bottom of the rolls to create a solid base.
- Place all of the Swiss cheese slices over the ham. Don’t be afraid to overlap them for extra cheesiness!
- Add the remaining ham on top of the cheese. This “ham sandwich” method keeps the cheese right in the middle.
- Place the top half of the rolls back on. Pour your butter mixture evenly over the top, making sure to hit every roll.
- Cover the baking dish tightly with aluminum foil. This traps the steam and melts that cheese beautifully.
- Bake for 15 minutes. Then, remove the foil and return the dish to the oven for another 10 minutes to brown the tops.
- Take them out of the oven. Let them rest for a minute or two so the cheese sets, then cut and serve immediately.
Cooking Variations and Techniques
You can actually make these ham and cheese sliders ahead of time! Assemble them completely, cover them, and keep them in the fridge overnight. When you’re ready to eat, just pop them in the oven. They might need five extra minutes of baking since they are starting cold.
If you love a crispy texture, try baking them on a sheet pan instead of a deep dish. This allows the hot air to circulate around the sides of the rolls for a crunchier bite. For a “honey mustard” version, increase the brown sugar and use a grainier mustard.
If you are hosting a party and need a variety of snacks, these sliders are great alongside something with a bit of a kick. I love serving them with my cottage cheese buffalo chicken dip for that perfect spicy-and-sweet combination.
These also freeze surprisingly well! Wrap individual sliders in foil and freeze for up to a month. Just reheat them in the oven or toaster oven when the midnight snack cravings hit. It’s a lifesaver for busy moms or anyone who needs a quick meal on the go.

FAQs About Ham and Cheese Sliders
Can I use a different kind of bread?
Absolutely! While Hawaiian rolls are traditional, brioche rolls or small dinner rolls work great too. Just adjust the sweetness of the glaze accordingly.
What should I serve with these?
I love serving them with a simple green salad or potato chips. If you’re looking for a more formal meal tonight instead of a snack, you can’t go wrong with a classic chicken parmigiana recipe.
What’s the best way to reheat them?
The oven or an air fryer is best. It keeps the bread from getting chewy like a microwave might. Just a few minutes at 350 degrees will do the trick.
Can I make these without poppy seeds?
Yes, you can leave them out. The flavor will still be amazing, just without the little decorative crunch.
Conclusion
There you have it! My go-to recipe for the most delicious ham and cheese sliders you’ll ever taste. Whether you’re feeding a house full of teenagers or just looking for an easy weeknight dinner, these are a guaranteed winner.
I’ve found that food is the best way to show people you care. A warm slider says “I love you” pretty well in my book! I hope this recipe becomes a staple in your home just like it has in mine. It’s simple, it’s honest, and it’s flat-out tasty. What more could a home cook ask for?
Don’t be afraid to get in the kitchen and make this recipe your own. Every family has different tastes, so feel free to tweak the spices or the cheese. I’d love to hear how yours turned out! Did your family love them as much as mine does?

Ham and Cheese Sliders
Equipment
- 9×13 inch baking dish
- Small Mixing Bowl
- Serrated knife
- Aluminum foil
Ingredients
The Sliders
- 1 pound Hawaiian Rolls 12 large or 24 small
- 1 pound deli ham thinly sliced
- 1 pound Swiss cheese sliced
The Glaze
- 1/2 cup butter melted
- 2 tablespoons brown sugar
- 1 tablespoon Dijon mustard
- 1 1/2 teaspoons Worcestershire sauce
- 1 tablespoon poppy seeds
- 1 tablespoon dried minced onion or 1 1/2 tsp onion powder
Instructions
- Preheat the oven to 350 degrees F. Spray a 9 by 13 inch baking dish with cooking spray and set aside.
- In a small bowl, mix together the melted butter, brown sugar, mustard, Worcestershire sauce, poppy seeds, and dried onion.
- Cut the entire slab of rolls in half horizontally. Place the bottom half in the prepared baking dish.
- Top the bottom rolls with half of the ham. Layer all of the Swiss cheese over the ham, then top with the remaining ham.
- Place the tops of the rolls on the sandwiches and pour the butter mixture evenly over the top.
- Cover the dish with foil and bake for 15 minutes. Remove the foil and return to the oven for an additional 10 minutes until golden brown.
- Remove from the oven, cut into individual sliders, and serve immediately while hot.