Discover how to make Vijayawada Biryani, a spicy and aromatic South Indian rice dish bursting with bold flavors. This easy, step-by-step guide helps you create the perfect biryani at home.
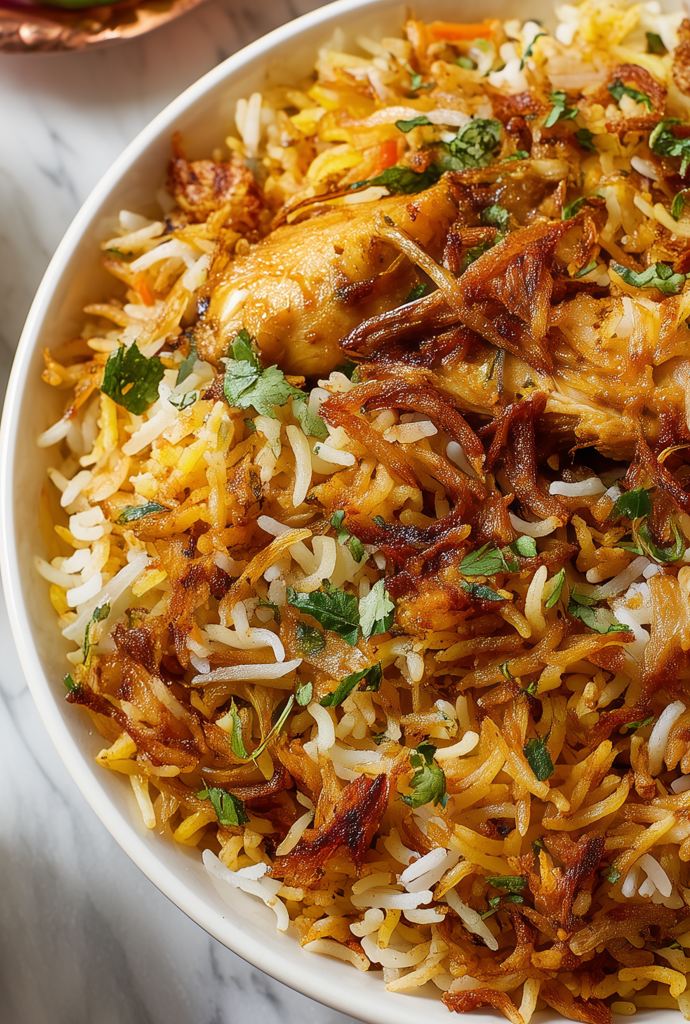
If you’ve never tasted Vijayawada Biryani, you’re in for a real treat. This South Indian specialty, hailing from Andhra Pradesh, is famous for its fiery spices and deeply satisfying flavors. Unlike the more subtly spiced Hyderabadi version, Vijayawada Biryani doesn’t hold back. It’s bold, intense, and downright irresistible.
Now, I know biryani can seem a little intimidating, especially if you’re new to Indian cooking. But don’t worry. I’m here to walk you through every step like we’re cooking side-by-side in my Florida kitchen. Grab your apron, and let’s make a dish your family will request again and again!
For the classic restaurant-style version, check out my authentic Vijayawada chicken biryani.
Table of contents
Main Ingredients for Vijayawada Biryani (The Flavor Makers)
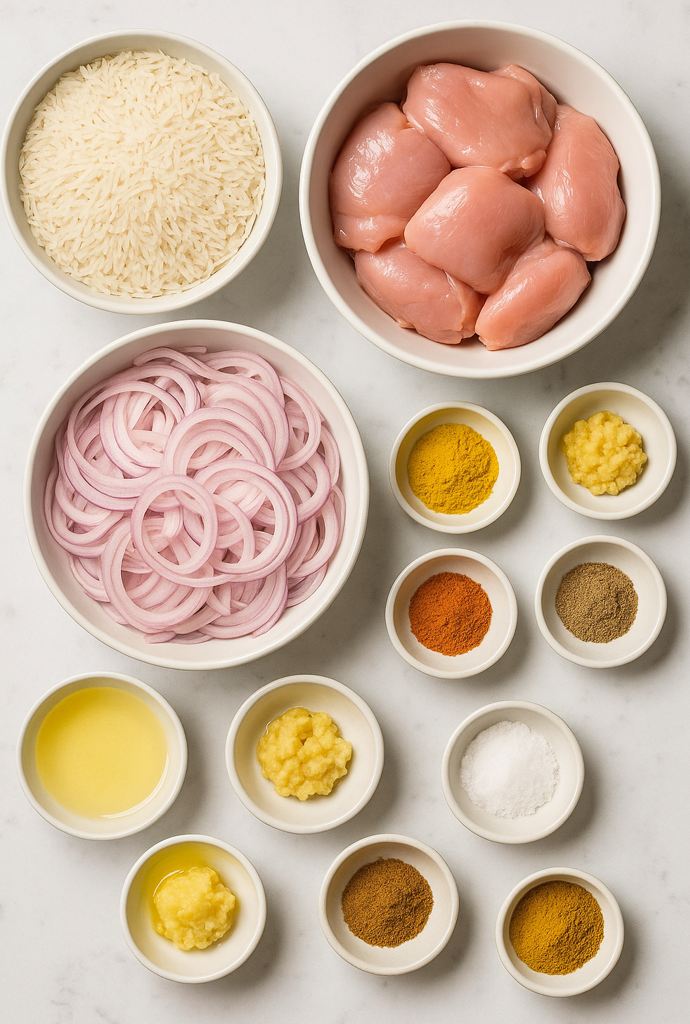
To make Vijayawada Biryani truly shine, you need to start with quality ingredients. Here’s what you’ll need:
- 2 lbs boneless, skinless organic chicken thighs: These stay juicy and flavorful, even after long cooking. Want deeper smoky flavor? You can also grill your chicken thighs on a pellet grill before layering them into the biryani.
- 2 cups basmati rice: Long-grain rice is a must. It soaks up all the spices beautifully.
- 4 large onions, thinly sliced: These caramelize into sweet, golden strands that add depth.
- 4 cloves garlic, minced: Because no good Indian dish starts without it!
- 1 tablespoon ginger paste: Adds that zingy, warming undertone.
- 1 teaspoon turmeric powder: For color and subtle earthy notes.
- 0.5 teaspoon red chili powder: Brings the heat! Adjust based on your tolerance.
- 1 teaspoon garam masala powder: A warm spice blend that ties everything together.
- 2 tablespoons ghee or clarified butter (optional): Adds richness and aroma.
- 2 tablespoons vegetable oil or coconut oil: Used to sauté and cook the chicken.
- Salt to taste: Always taste as you go.
These are the core ingredients that give Vijayawada Biryani its iconic flavor.
Additional Ingredients (Customize Your Way)
Want to make it even more special? Here are a few extras you can consider:
- Fresh green chilies: Slice a couple if you’re craving more spice.
- Plain yogurt: A spoon or two can tenderize the chicken and add creaminess.
- Lemon juice: Brightens the whole dish, especially right before serving.
- Fresh cilantro and mint: These herbs add a pop of color and fresh flavor when sprinkled on top.
- Whole spices (like bay leaves, cloves, or cardamom pods): Toss them in the hot oil before adding onions for a deeper flavor base.
- Love pineapple with your chicken? Try my pineapple chicken and rice or the savory-sweet chicken and pineapple fried rice for a tropical spin.
Don’t worry if you don’t have all of these. The core recipe still shines without them.
Expert Tips (Tried and True Secrets)
Over the years, I’ve learned a few things that make Vijayawada Biryani come out just right. Let me share some tips:
- Use good-quality basmati rice. Rinse it well to remove excess starch, and soak it for at least 30 minutes before cooking. This helps it cook up fluffy, not sticky.
- Cook the chicken first. Unlike some biryanis where raw meat is layered with rice, we cook the chicken in spices first to make sure it’s fully infused with flavor.
- Don’t skimp on the onions. They caramelize into a rich, sweet base that balances all the heat from the spices.
- Layering is key. Once the chicken is ready and the rice is parboiled, layer them gently in your pot. Add some fried onions, herbs, and a drizzle of ghee or oil in between.
- Low and slow dum cooking. After layering, cover the pot tightly and cook on the lowest flame possible. This lets all the flavors meld beautifully without burning the bottom.
- Let it rest. After cooking, give the biryani a few minutes to settle before serving. Trust me, it makes a difference.
- Garnish with love. A sprinkle of fresh herbs or a squeeze of lemon goes a long way in balancing the richness.
Honestly, the process is half the fun. Don’t rush it, enjoy the aromas filling your kitchen!
Recommended Techniques for The Best Vijayawada Biryani
To get that authentic Vijayawada Biryani taste, try these best practices:
- Soak your rice: 30 minutes minimum.
- Cook chicken separately: Spices develop better this way.
- Caramelize onions deeply: Golden brown, not just translucent.
- Layer rice and meat: Don’t stir after layering.
- Seal the pot: Use foil or dough to trap the steam.
- Cook on low: Prevents burning and ensures even cooking.
These small steps make a big difference in the final dish.
Step-by-Step Instructions
- Prep your rice: Rinse and soak your basmati rice. Cook until it’s 80% done, then drain and set aside.
- Caramelize onions: Heat oil in a large pot and cook the sliced onions until golden. Remove half and set aside for layering.
- Cook the chicken: In the same pot, add garlic and ginger paste. Sauté for a minute. Then add turmeric, chili powder, salt, and chicken. Cook until the chicken is fully done and the spices are well absorbed.
- Layer it up: Turn off the heat. Sprinkle garam masala over the chicken, then gently add the rice. Top with reserved onions and optional ghee.
- Dum cooking: Cover the pot tightly. Place on the lowest heat setting and cook for 15–20 minutes.
- Rest and fluff: Let the biryani rest for 5 minutes. Then gently fluff with a fork.
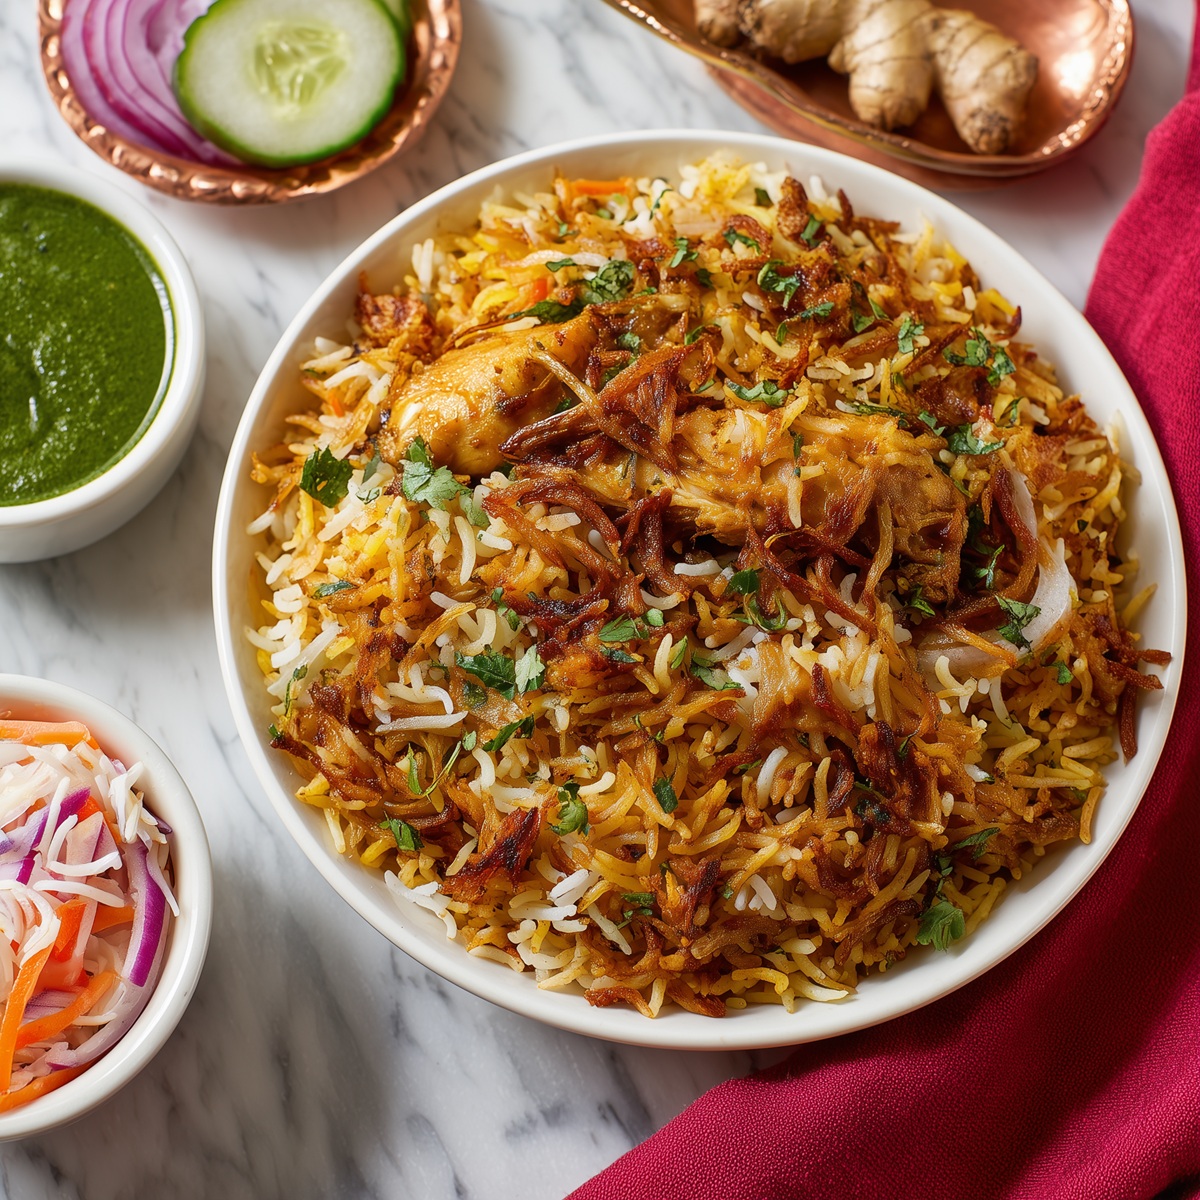
- Serve: Plate it up and enjoy with a side of raita or salad.
Additional Guide: Variations & Extras
Looking to mix things up?
- Spicy Egg Biryani: Swap chicken for boiled eggs. Slice them in half and cook them in the same spice mix.
- Vegetarian version: Use paneer or mixed vegetables like potatoes, carrots, and peas.
- Pressure cooker method: You can do a quick version in a pressure cooker. Just reduce the water for rice and cook for one whistle. If you’re into bold, comforting meals, try my Mississippi chicken in the Instant Pot – it’s a southern-inspired favorite with tangy flair.
- Instant Pot shortcut: Sauté as usual, then layer and cook using the “rice” setting for a quicker fix. Or, if you’re craving a quicker version, you might love this dreamy Instant Pot chicken and rice.
- Looking for something with a kick and tang? My kimchi chicken fried rice brings Korean flair to your table in minutes.
Try these out and find your favorite twist on Vijayawada Biryani.
FAQs About Vijayawada Biryani
What can I serve with this?
Cucumber raita, a simple green salad, or even a boiled egg on top all pair beautifully. If you’re a fan of old-fashioned comfort food, don’t miss my old fashioned chicken and rice casserole – it’s a classic that brings cozy vibes with every bite.
How spicy is it?
It’s definitely on the hotter side. But you can dial it down by reducing the chili powder or skipping green chilies.
Conclusion
There you have it, friend, a complete guide to making Vijayawada Biryani right in your own kitchen. Whether you’re cooking for family, friends, or just treating yourself to something special, this dish delivers every time. It’s comforting, bold, and packed with love.
So go ahead, give it a try. And if you do, I’d love to hear how it turned out. Snap a pic, tag me, or just drop a comment. After all, good food is even better when it’s shared.
And hey, if you’re an air fryer chicken fan, you’ll love how easy these frozen chicken wings in the air fryer come together. Perfect for a quick snack before biryani dinner!
Happy cooking!
Warmly,

Vijayawada Biryani
Equipment
- Large Pot
- Knife
- Cutting Board
Ingredients
- 2 lbs boneless, skinless organic chicken thighs
- 2 cups basmati rice rinsed and soaked
- 4 large onions thinly sliced
- 4 cloves garlic minced
- 1 tbsp ginger paste
- 1 tsp turmeric powder
- 0.5 tsp red chili powder
- 1 tsp garam masala powder
- 2 tbsp ghee or clarified butter optional
- 2 tbsp vegetable oil or coconut oil
- to taste salt
Instructions
- Rinse and soak basmati rice for 20 minutes, then drain completely.
- Heat oil in a large pot. Add sliced onions and cook until golden brown.
- Add garlic and ginger paste. Sauté for 2–3 minutes until fragrant.
- Add chicken thighs, turmeric, red chili powder, salt, and cook until browned.
- Pour in 4 cups of water. Bring to a boil, then reduce to simmer.
- Add soaked rice to the pot and gently mix with the chicken.
- Cover and cook on low for 20–25 minutes until rice is cooked and fluffy.
- Garnish with fried onions, mint, or coriander if desired. Serve hot.